
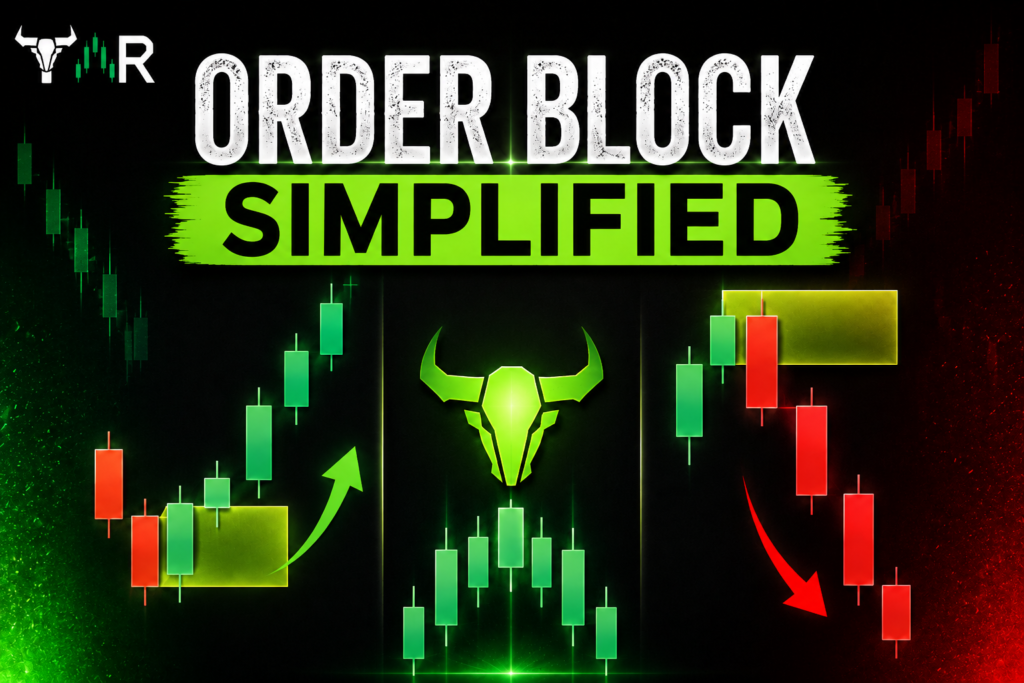
The ICT Order Block: A Complete Guide
If you had to pick one concept that everything else in the ICT method leans on, it would be the Order Block. It’s the price zone where institutions quietly loaded up a large batch of orders right before the market took off in one direction — and once that zone gets left behind, it keeps pulling price back to it. A huge chunk of other ICT setups — Breaker Blocks, Mitigation Blocks, the Unicorn Model, even the entry leg of the Silver Bullet — are really just different ways of using this same core idea.
Once you can read an Order Block properly, it tells you roughly where the big players are sitting. Instead of chasing price, you wait for it to come back to that zone and step in alongside the institutions rather than against them.
This guide walks through what an Order Block actually is, how to spot one on a chart, the bullish and bearish versions, the trade flow I personally follow step by step, the mistakes that trip people up the most, and the questions I get asked constantly. If Order Blocks are new to you, this is the place to start. Once you’ve got the basics down, there are separate deep-dive guides on the bullish and bearish variants worth checking out.
What is an ICT Order Block?
An Order Block is simply the spot on the chart where a large number of institutional orders got filled right before price suddenly broke away from that level. It’s the footprint they leave behind.
Here’s why it happens: big players can’t fill a massive order at a single price without moving the market against themselves. So instead, they build their position slowly, over a tight price range. Once they’ve got what they need, they let price rip away from that zone — and that’s the Order Block that gets left behind.
The reason retail traders care about this zone is that price has a habit of coming back to it. When that happens, whatever part of the institutional order didn’t get filled the first time around gets mitigated on the retest, and price usually reacts hard — typically continuing in the same direction as the original move.
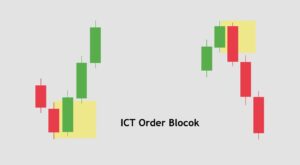
Types of ICT Order Block
Order Blocks split into two flavors depending on which way the market is heading — bullish and bearish. Each has its own rules for confirming it’s valid.
Bullish Order Block — the final bearish candle right before a strong bullish move.
Bearish Order Block — the final bullish candle right before a strong bearish move.
Both are at minimum a two-candle pattern, where the first candle moves opposite to the direction of the impulse that follows.
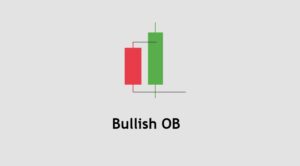
Bullish Order Block
A bullish Order Block is the last bearish candle before price pushes higher with force. Usually it’s a two-candle pattern — a bearish candle (the OB itself), followed by a bullish candle that swallows it whole.
How to spot one:
For a bullish Order Block to count, four things need to line up:
- The bullish candle needs to dip below the low of that prior bearish candle before it reverses.
- It then needs to close above the high of that bearish candle — a full engulf.
- There should be an imbalance (a fair value gap) showing up on the lower timeframe, either inside the OB zone or just above it.
- The lower timeframe should show a shift in market structure to the upside, confirming the bullish move is real.
Put simply — the second candle should completely swallow the first, body and wick, and that swallow needs to happen at a spot where the lower timeframe is also showing imbalance and a structural shift.
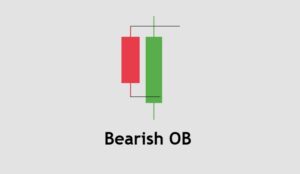
Bearish Order Block
A bearish Order Block works the same way in reverse — it’s the last bullish candle before price drops hard. Two candles: the first bullish (the OB), the second bearish and engulfing it entirely.
How to spot one:
- The bearish candle needs to poke above the high of the prior bullish candle before turning down.
- It then needs to close below the low of that bullish candle.
- An imbalance should appear on the lower timeframe, inside or just below the OB zone.
- A Market Structure Shift to the downside on the lower timeframe should confirm it.
Same logic as before, just flipped — full engulf, body and wick, backed up by imbalance and structure shift on the lower timeframe.
Step-by-Step Order Block Trade Flow
This is the sequence I actually run through every time I take an Order Block trade. Worth saving somewhere you’ll actually look at it.
- Start with your daily bias. Order Block trades work best when they’re aligned with the higher-timeframe direction.
- Mark out the higher-timeframe PD Array — daily, 4-hour, or 1-hour — wherever you expect institutions to be positioned.
- Let price come to that zone on its own. Don’t pre-position yourself.
- Once price taps it, drop down to the 5-minute or 3-minute chart.
- Watch for the impulse move in your bias direction — strong bodies, small wicks, ideally leaving a fair value gap behind.
- Find the last candle that went against that impulse — that’s your Order Block.
- Run it through the four validation checks — full engulf, lower-timeframe imbalance, and a structure shift matching the impulse direction.
- Wait for price to come back and retest the OB zone. Don’t jump in on the impulse itself.
- Enter on the retest, with your stop 10–20 pips past the OB’s extreme — below the low for a bullish setup, above the high for a bearish one.
- Take profit at the next meaningful liquidity target in your direction.
Bullish Order Block Trading Strategy
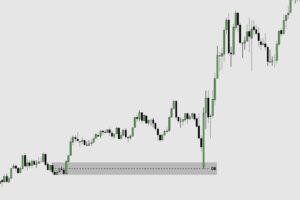
For a bullish setup, I’m watching for delivery to flip from bearish to bullish. When the broader trend has been bearish and price reaches a higher-timeframe demand zone (a discount PD Array), I drop down a timeframe and wait to see if structure shifts upward.
That shift is what produces the impulse. The last bearish candle before it — the one that gets engulfed by the push higher — is your bullish Order Block.
From there, I just wait for price to come back and tap that zone. That retest is the entry.
Stop loss sits 10–20 pips below the OB low. Take profit aims at the next pocket of buy-side liquidity — equal highs, a previous swing high, or a higher-timeframe premium PD Array.
Bearish Order Block Trading Strategy
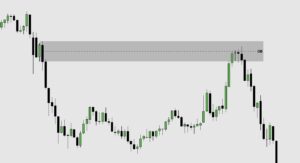
Mirror image on the sell side. When the trend has been bullish and price reaches a higher-timeframe supply zone (a premium PD Array), I’m looking for structure to flip downward on the lower timeframe.
That shift produces the impulse move down, and the last bullish candle before it — the one swallowed by the bearish push — becomes the bearish Order Block.
Again, I just wait for the retrace back into that zone, and that’s the sell entry.
Stop loss goes 10–20 pips above the OB high. Take profit targets the next sell-side liquidity pool — equal lows, a prior swing low, or a higher-timeframe discount PD Array.
Order Blocks in Trends — Continuation Setups
Order Blocks aren’t just for catching reversals — they show up mid-trend too, and honestly, these continuation setups tend to be some of the cleanest, highest-probability trades in the whole method.
In a downtrend, after a small bullish pullback, you’ll sometimes see a bearish Order Block form that confirms the downtrend still has strength — that’s a spot to add another sell in line with the trend. Same idea in an uptrend: after a pullback, a bullish Order Block forming can be a clean spot to add to your longs.
The validation rules don’t change — full engulf, lower-timeframe imbalance, structure shift matching the trend. The only real difference is context: these sit in the middle of an existing move rather than at a higher-timeframe reversal point.
USA Trading Note — ES & NQ Futures
For traders based in the US, Order Blocks tend to print most cleanly on the index futures — the NASDAQ 100 (NQ) and the E-mini S&P 500 (ES). The way the CME session is structured produces tighter, more precise impulse moves than you’ll typically see on lower-volume forex pairs. Both ES and NQ are CFTC-regulated and trade through a US futures broker — think NinjaTrader, AMP, Tradovate, or a prop firm like Topstep. The major USD pairs (GBP/USD, EUR/USD) and Gold also respect Order Block behavior reasonably well. TradingView is useful here purely for chart analysis.
Common Mistakes I See Traders Make on Order Blocks
Most failed Order Block trades I come across in the comments boil down to one of these five issues. Clean these up and your win rate goes up noticeably.
- Calling any opposing candle an Order Block. Not every bearish candle before a rally is a real OB. All four conditions need to be met — full engulf, lower-timeframe imbalance, structure shift, and a genuine impulse. Skip any of those and it’s just a candle, not a setup.
- Trading against the daily bias. Setups that go against the higher-timeframe bias fail a lot more often than ones aligned with it. Always run your setup through the daily bias filter first.
- Setting stops too close to the OB extreme. Give it 10–20 pips of room past the OB low or high. A stop that’s just a pip or two beyond the OB tends to get clipped by the usual retest spike.
- Ignoring the imbalance requirement. An Order Block with no fair value gap attached is a much weaker signal. The FVG is what tells you the impulse actually had enough force behind it.
- Mixing up an Order Block with a Breaker Block. An OB is a fresh institutional level — price comes back and continues in the same direction. A Breaker Block is what happens when that OB fails — price closes past it, liquidity gets swept, and the trade idea flips. Same spot on the chart, completely opposite trade.
Final Thoughts
The Order Block really is the foundation piece. Once you understand it properly, a lot of other ICT concepts start clicking faster, because they’re all built off this same mechanic — Breaker Blocks, Mitigation Blocks, the Unicorn Model, and the entries inside every kill zone setup. Nail the Order Block, and everything else gets easier.
FAQs About the ICT Order Block
What is an ICT Order Block? It’s the price zone where institutions filled a large batch of orders right before a strong impulse move. It’s essentially the visible trace of institutional positioning, and price tends to come back to that level to mitigate whatever wasn’t filled the first time.
What is a bullish Order Block? The last bearish candle before a bullish impulse. It’s confirmed once the following bullish candle takes out the OB’s low and closes above its high, with imbalance and a structure shift backing it up on the lower timeframe.
What is a bearish Order Block? The last bullish candle before a bearish impulse, confirmed when the next bearish candle breaks the OB’s high and closes below its low, again with imbalance and structure shift on the lower timeframe.
How do I identify a valid Order Block? Four things: the impulse candle fully engulfs the OB (body and wick), a fair value gap shows up on the lower timeframe near the OB zone, a Market Structure Shift confirms the direction, and the whole thing follows a tap of a higher-timeframe PD Array.
Where should I place my stop loss on an Order Block trade? 10–20 pips past the OB’s extreme — below the low for a bullish trade, above the high for a bearish one. That buffer covers the typical spike you get on the retest.
What’s the difference between an Order Block and a Breaker Block? An Order Block is a fresh level — price retraces to it and keeps going in the same direction. A Breaker Block is a failed Order Block — price closed past it, swept the liquidity, and now trades the other way. Same chart level, opposite idea.
Do Order Blocks work in trending markets? Yes — continuation Order Blocks form mid-trend after a pullback, and they’re often some of the cleanest entries to add to an existing position.
What’s the best timeframe for Order Blocks? Daily and 4-hour for the big, higher-timeframe zones that produce the largest moves. 5-minute and 15-minute for entry-level OBs once a higher-timeframe zone gets tapped. Use both together — higher timeframe for context, lower timeframe for execution.
Which instruments work best for this? US index futures — NQ and ES — tend to give the cleanest Order Blocks thanks to how tight the CME session structure is. Major forex pairs like GBP/USD and EUR/USD, along with Gold, also respect Order Block mechanics reasonably well.